If there were awards for "The Movie (Series) That Spawned the Most Cosplayers/Costumers," I'm pretty sure that Peter Jackson's Lord of the Rings trilogy would be a strong contender. Goodness knows, it was instrumental in getting me started on my own costume-making journey! I remember when we first heard that FotR was coming out, I made "elven" capes for my best friend and another friend to wear to the movie. Because I was a poor college student who had no idea what I was doing, I bought a couple yards each of two different colors of the wispiest acetate lining fabric, then sewed two half-circle capes with unfinished, fraying seams, the rippliest, most uneven hem in the world, and I was so proud.
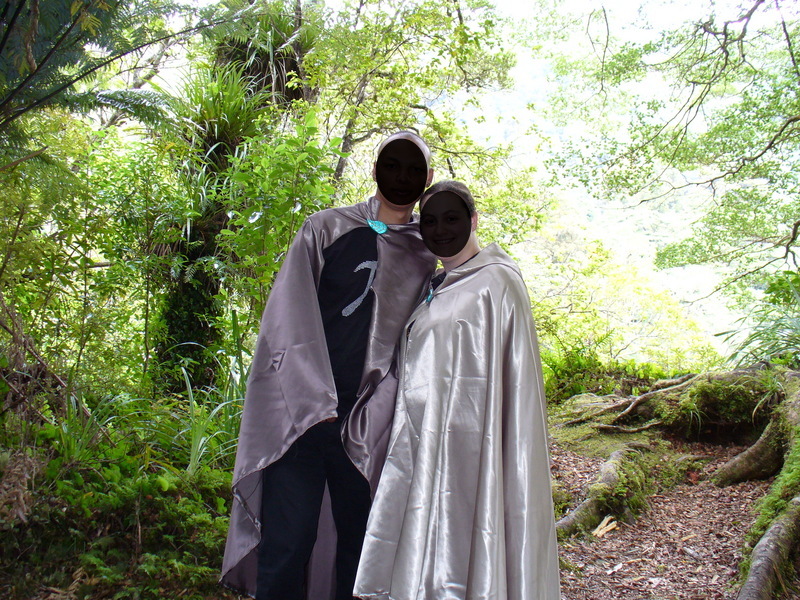 |
| But these capes made it to NZ, to the actual filming location of the Nazgul riding past the hobbits hiding under tree roots! |
In the years since then, I've made myself a number of Middle Earth-related costumes: a green Eowyn dress (from sheets), a hobbit maiden (from sheets), a Galadriel dress (not from sheets), an Eye of Sauron/Barad-dur headdress (from a balloon), a Party King Thranduil costume (that Lee Pace then tweeted!), a Smaug fancy dress outfit, and a Denethor + Pippin look with my daughter, and that's not even counting all the costumes for other people or Middle Earth crafts I've done. But the unifying theme for all of these costumes was a lack of screen-accuracy. Don't get me wrong, most of them were certainly recognizable as their characters (except maybe Smaug), but my modus operandi is very suited to community theater costuming: get the idea across as cheaply as possible, and assume that the audience will be standing several feet back. Also, using recycled/thrifted/secondhand materials means that finding screen accurate fabrics is nigh impossible.
But since this is the Year of the Ring, I wanted to make one of my dream cosplays, Eowyn's camp dress, as close to screen-accurate as possible, while still keeping to my not-new-fabrics pledge as much as I reasonably could.
 |
| From the invaluable Costumer's Guide. |
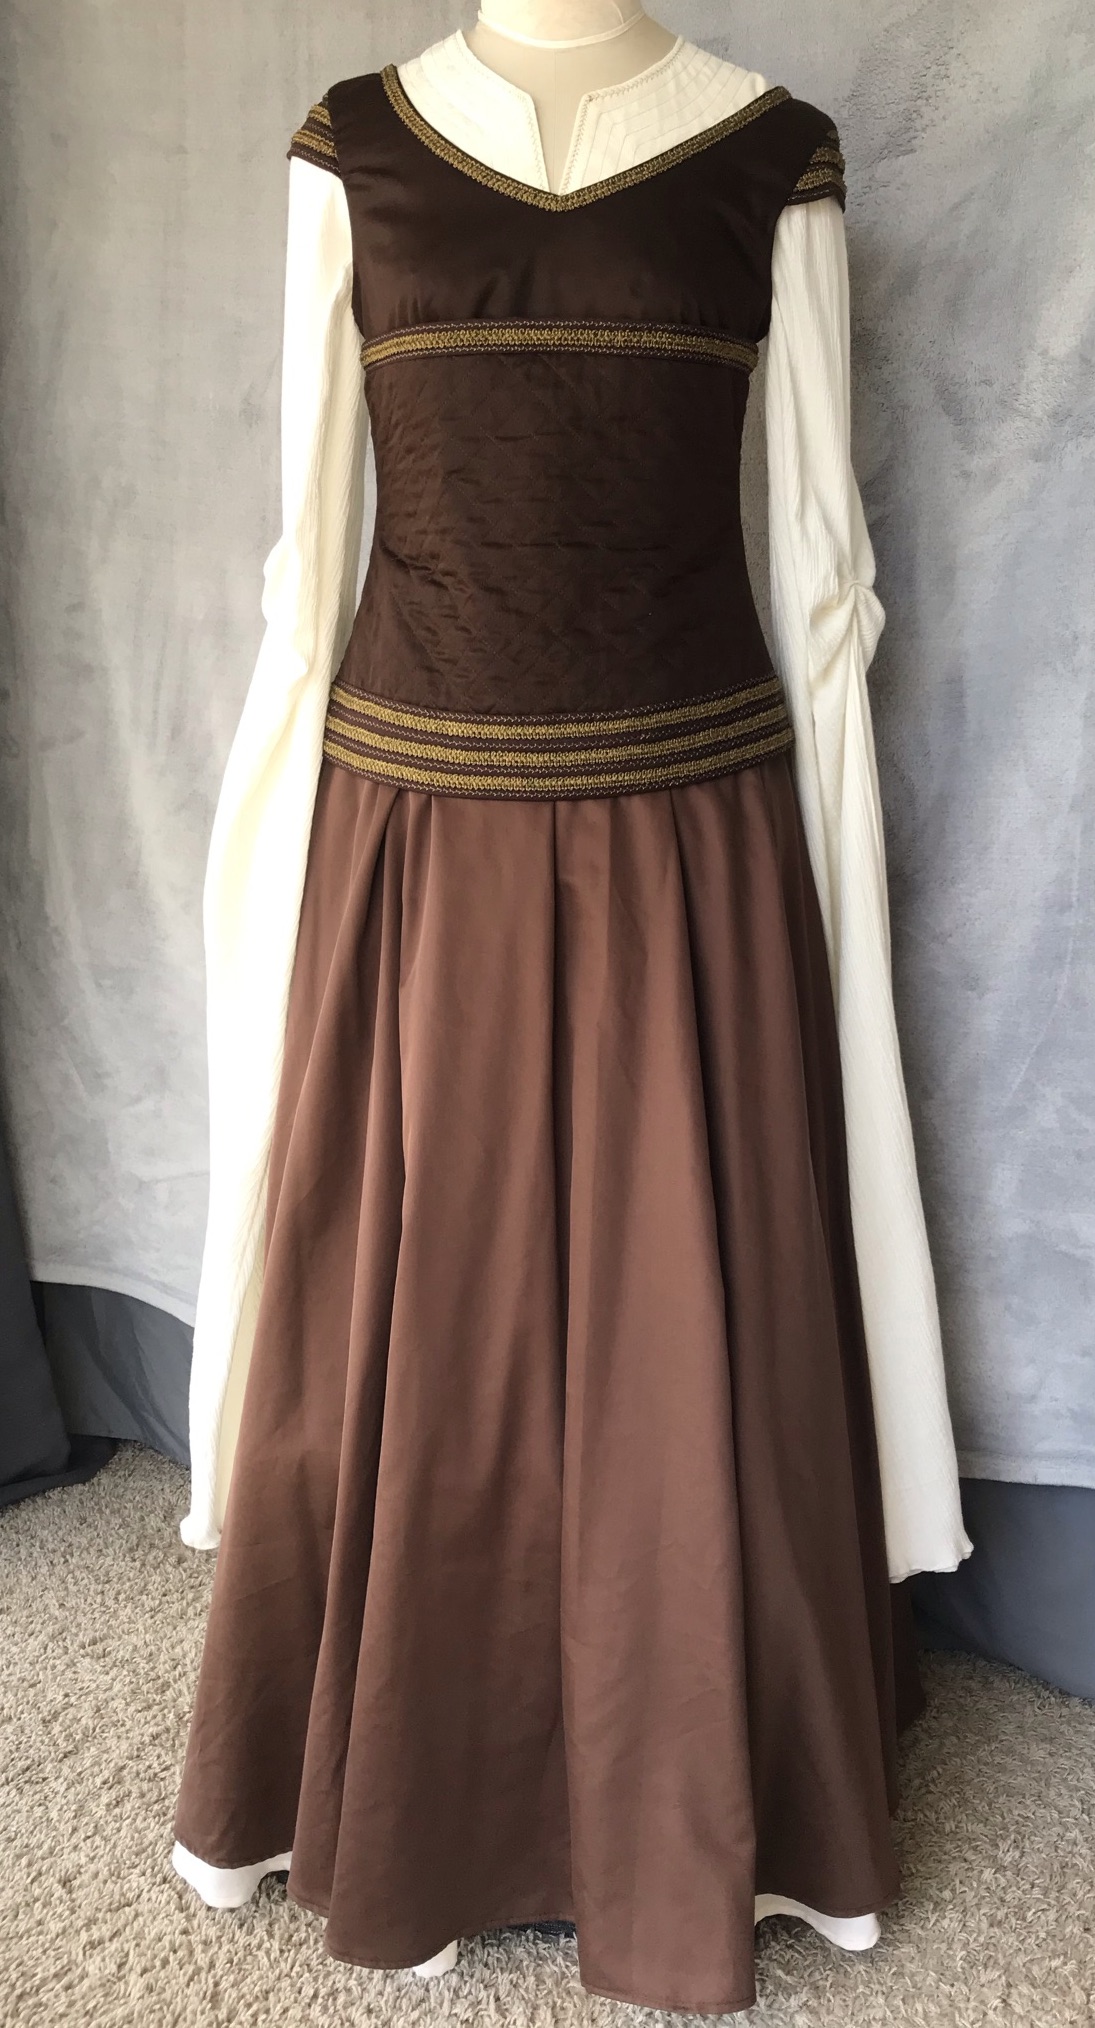
I started with the inner layer, her cream-colored "chemise." I reused the bodice of a toile I made for my pirate coat as my base, since the unbleached muslin worked color-wise. For the neckline that would show above the brown bodice, I used a cream-colored jacquard with swirls that I had leftover from a millinery class. I then treated that fashion fabric layer like a facing but flipped it to the outside instead of the inside, effectively finishing the neckline edge, then zigzagged the raw edge down since it won't be visible. Rather than sewing the tiny tuck lines, I opted to keep things simple and just sewed parallel lines in gold thread. I think it works fine visually while saving myself the annoyance of trying to actually make such tiny tucks and keep them even.
 |
| It fits better on me than Cecily. |
 |
| How many shortcuts can you spot in this picture? ;) |
The sleeves were essentially really long bell sleeves with a slit cut up the center to the elbow (see this diagram, except my slit went up higher and the overall triangle shape had a wider base) that I narrow hemmed by machine. I made them out of cream-colored crinkle cotton that I inherited from a friend's stash. For the braided ties, I ended up purchasing new trim from Jo-Ann Fabrics, but they only had bright white so I had to coffee-dye them. I accidentally left them in the coffee too long, so they're darker than I would like, but oh well. The cream-colored underskirt is a half-circle skirt made from, surprise surprise, a thrifted cream-colored sheet. The opening for this whole underlayer closes with hooks and thread loops down the front.
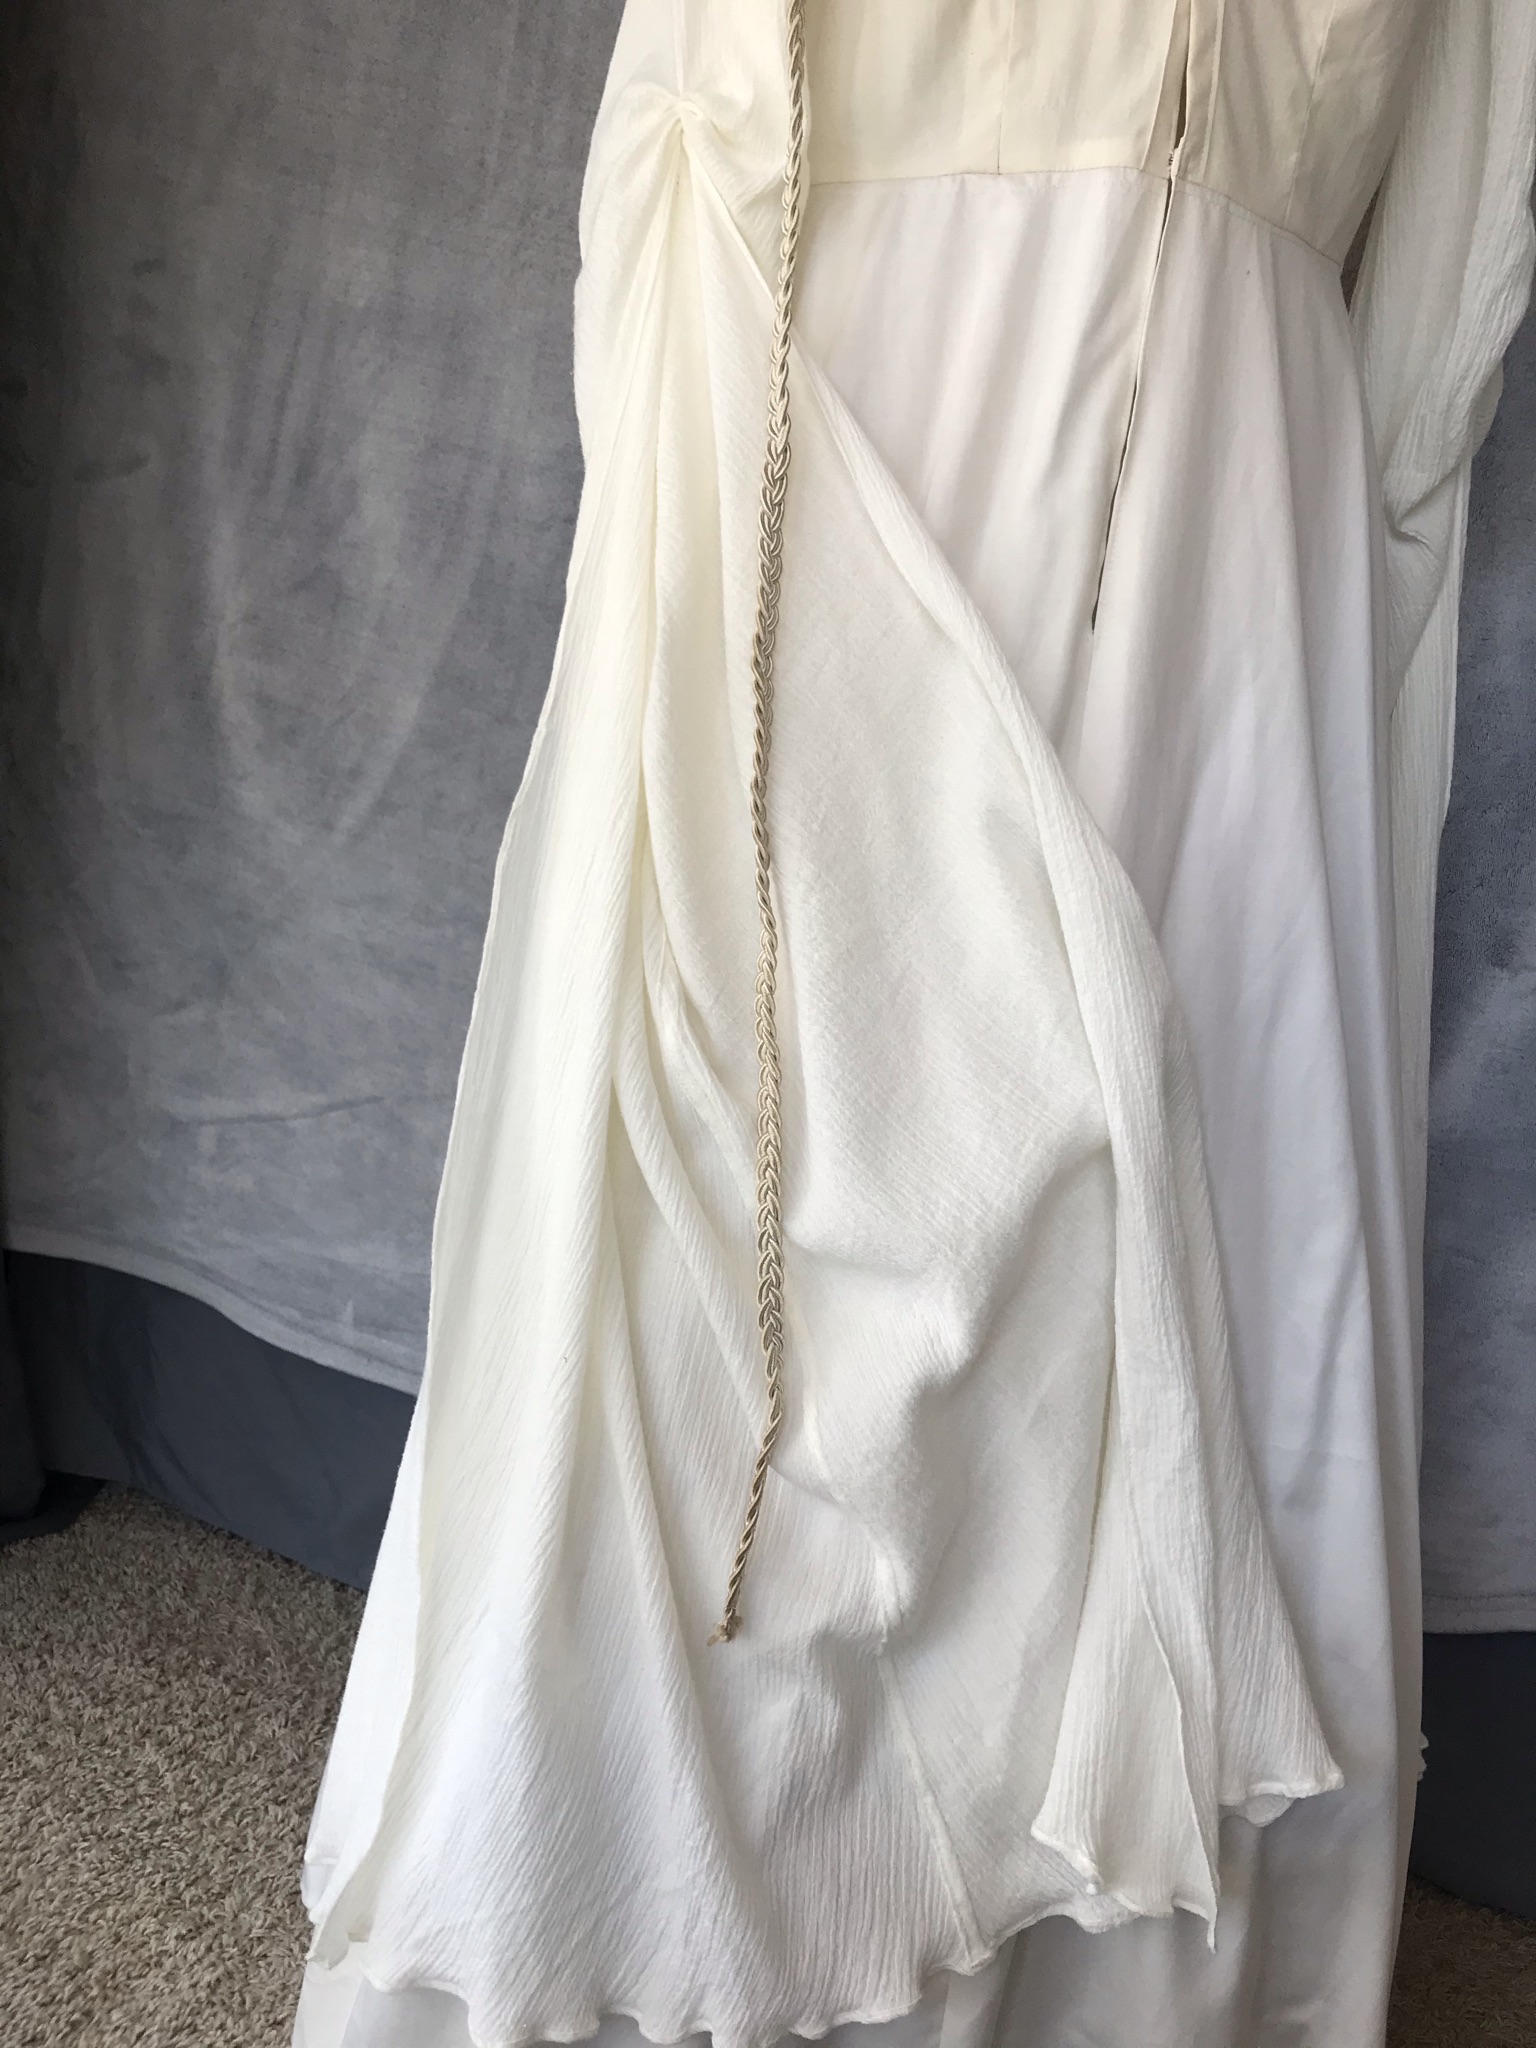 |
| Here you can see how dark the braid turned out, as well as how nicely lettucey the crinkle cotton hem is. |
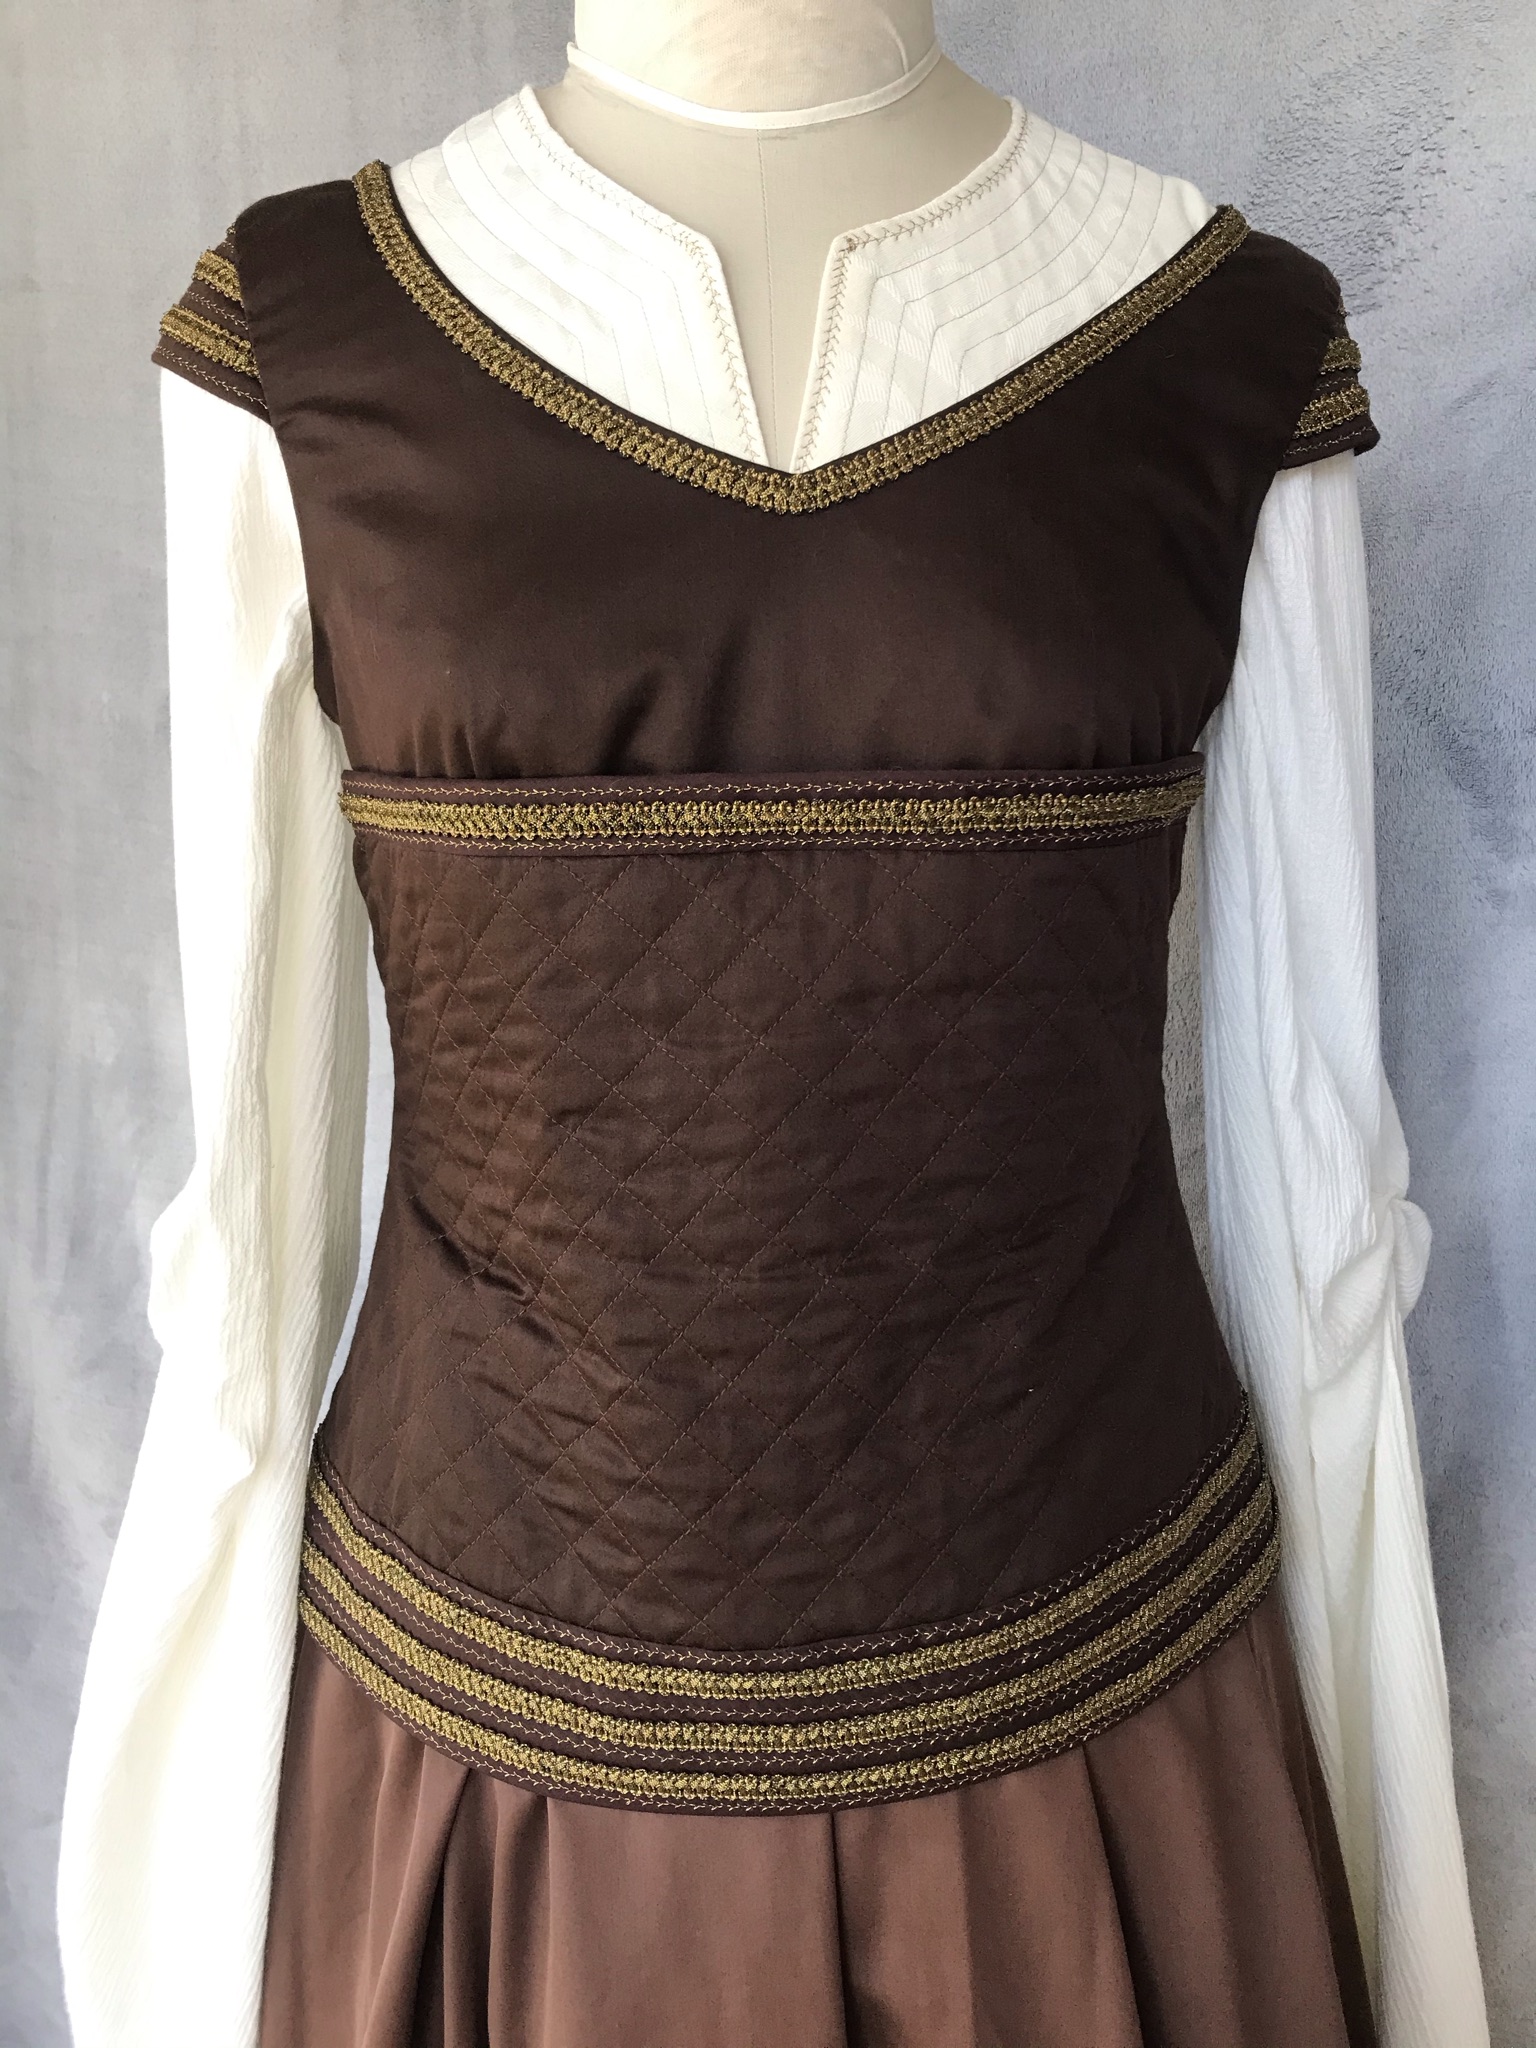
For Eowyn's brown bodice and corselet, I used a thrifted dark brown cotton sateen sheet from my stash (basically if I'm at the thrift store getting kids' clothes and I see a solid colored cotton sateen sheet in good condition, I'll buy it for costuming purposes) as the fashion fabric. The bodice from Simplicity 4940 (now sadly OOP) was a good starting point, although I had to draft my own cap sleeves. For the bodice neckline and corselet trim, I toyed with the idea of custom embroidery, but ended up going the easier route of machine-sewing a line of decorative stitching and then hand-sewing gold braid to dark brown bias tape, which I then used to finish the edges of said garments. The cap sleeves had the same decorative machine stitch + gold braid combo and were self-lined, then the armhole was finished with bias tape.
 |
| Dark brown bodice, made with Simplicity 4940. |
 |
| Close up of the trim. |
 |
| Inside: I lined it with more sheeting and used black bias tape to finish the armhole. You can also see my hand stitches at the neckline securing the braid. |
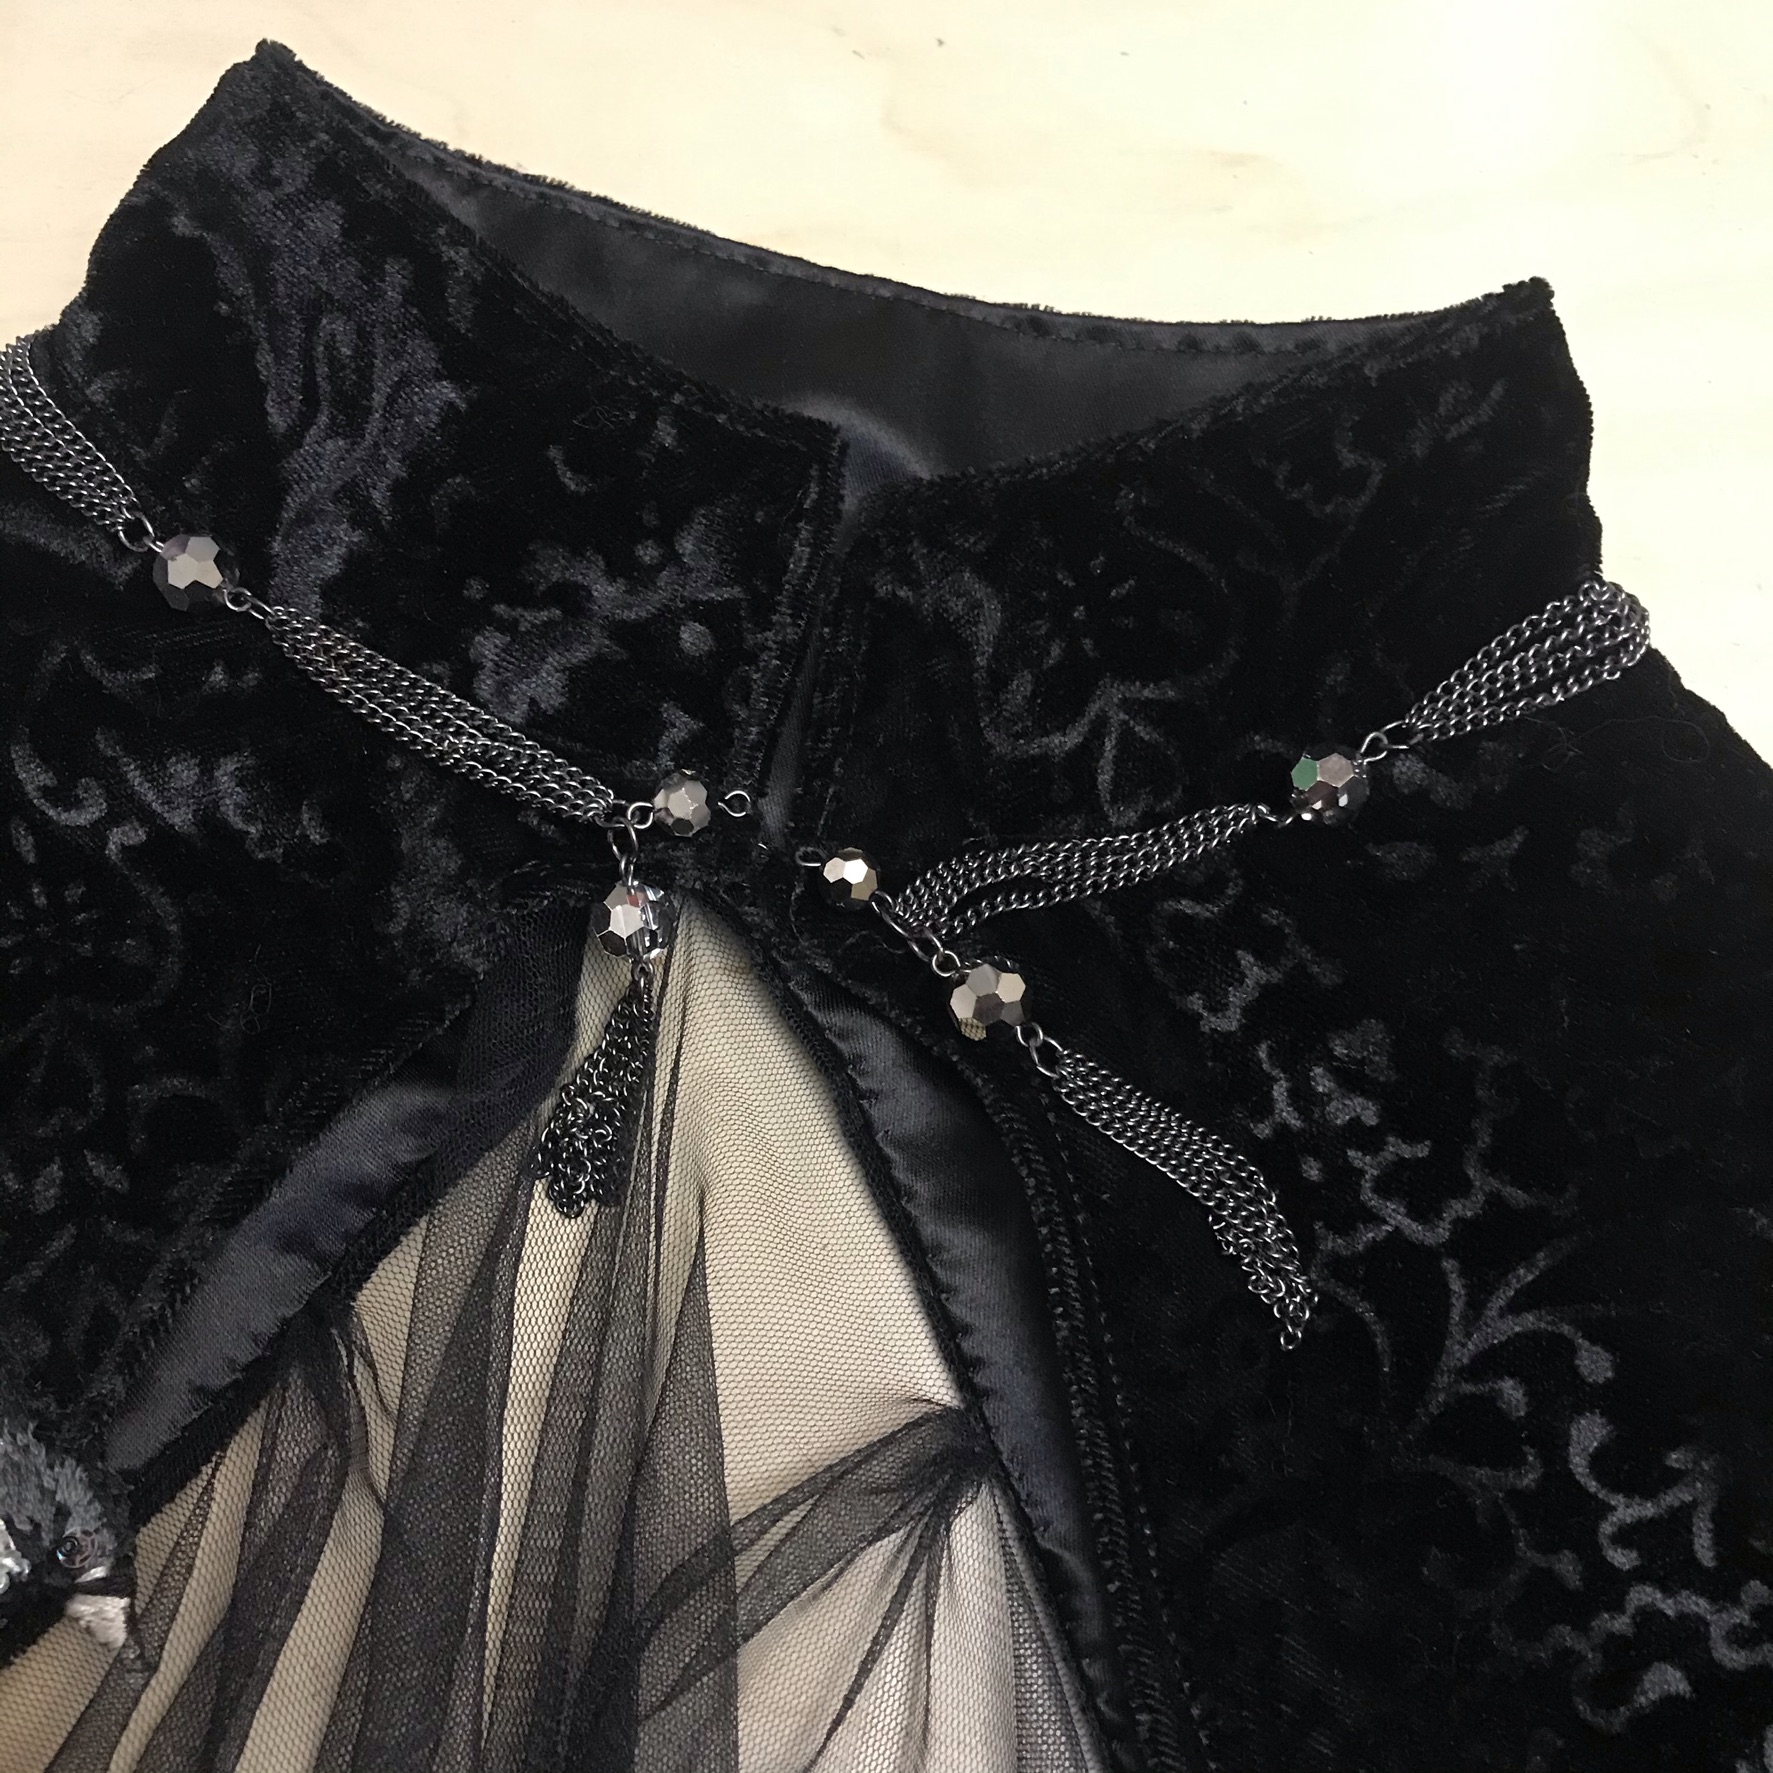
The corselet was drafted according to the instructions on Koshkathecat's absolutely invaluable costuming page; I first used those instructions for my Bellatrix corselet and mentally bookmarked it for the day when I would actually make Eowyn, and now I have! I cut one layer from cotton canvas and boned it with zip ties, then cut two more layers: from the dark brown sateen, and from quilt batting remnants. I quilted these last two layers together to get the distinctive diamond pattern, then basted all of it together and finished it with the trim pieces. I was so glad to have borrowed a tabletop grommeter from AJ of Confused Kitty Sewing, which made the whole last step so much easier than hammering everything in by hand! I did have to purchase brown rattail cord for the lacing as well.
 |
| I'm so pleased with how the quilting came out! |
 |
| Secret secrets revealed to you: I had to add a little bias tape patch at the top of the back opening so as to wedge in a tiny piece of (ziptie) boning since my original piece wasn't long enough, and I'd already sewed on all the trim. |
 |
| All the pieces together! |
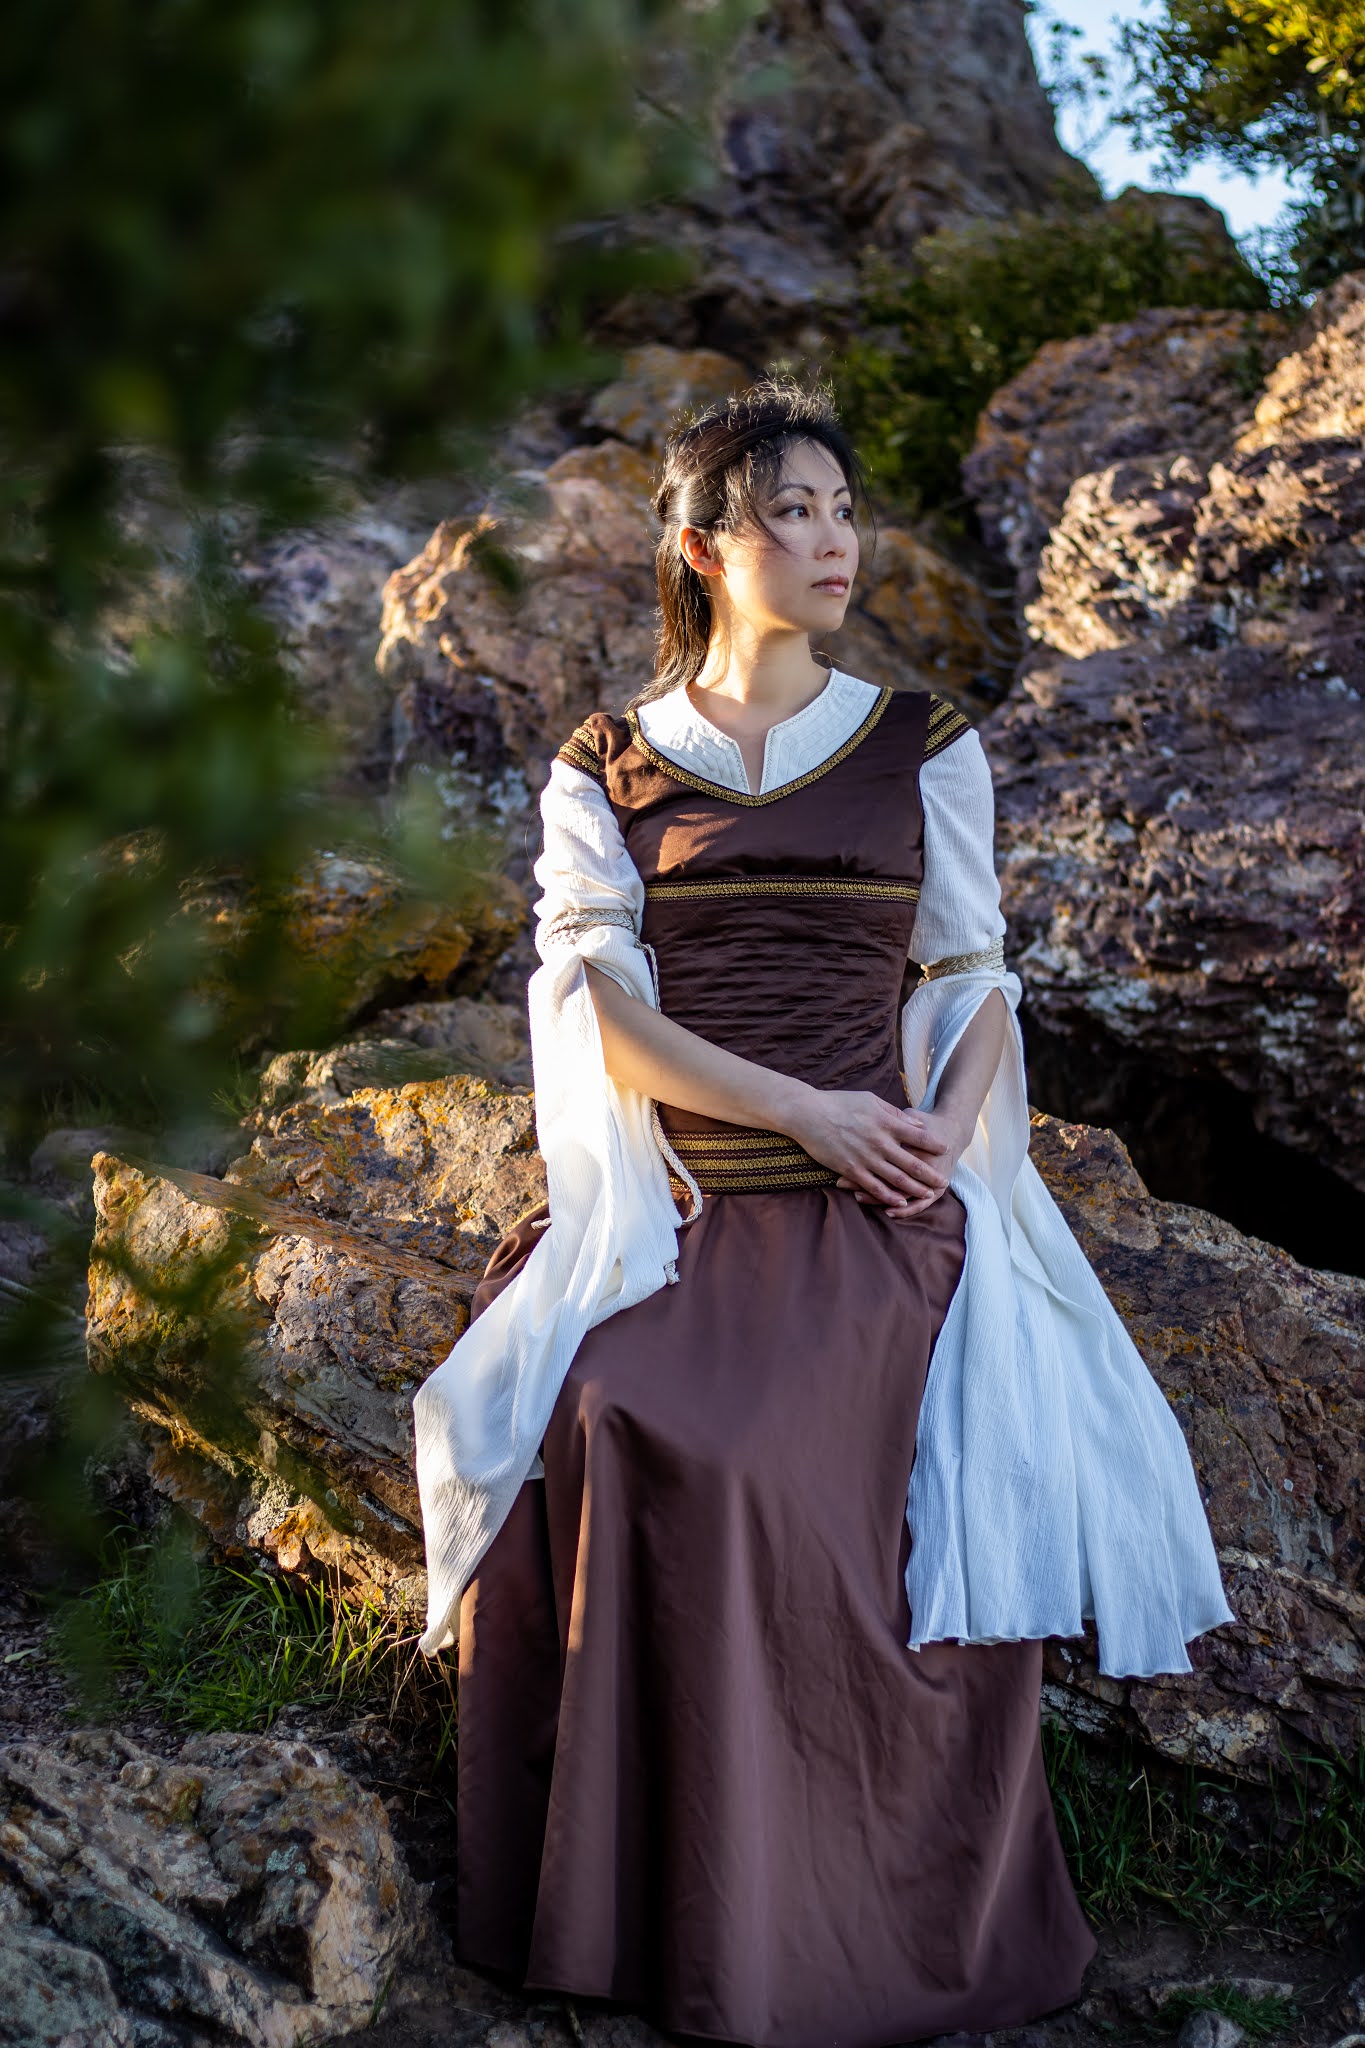
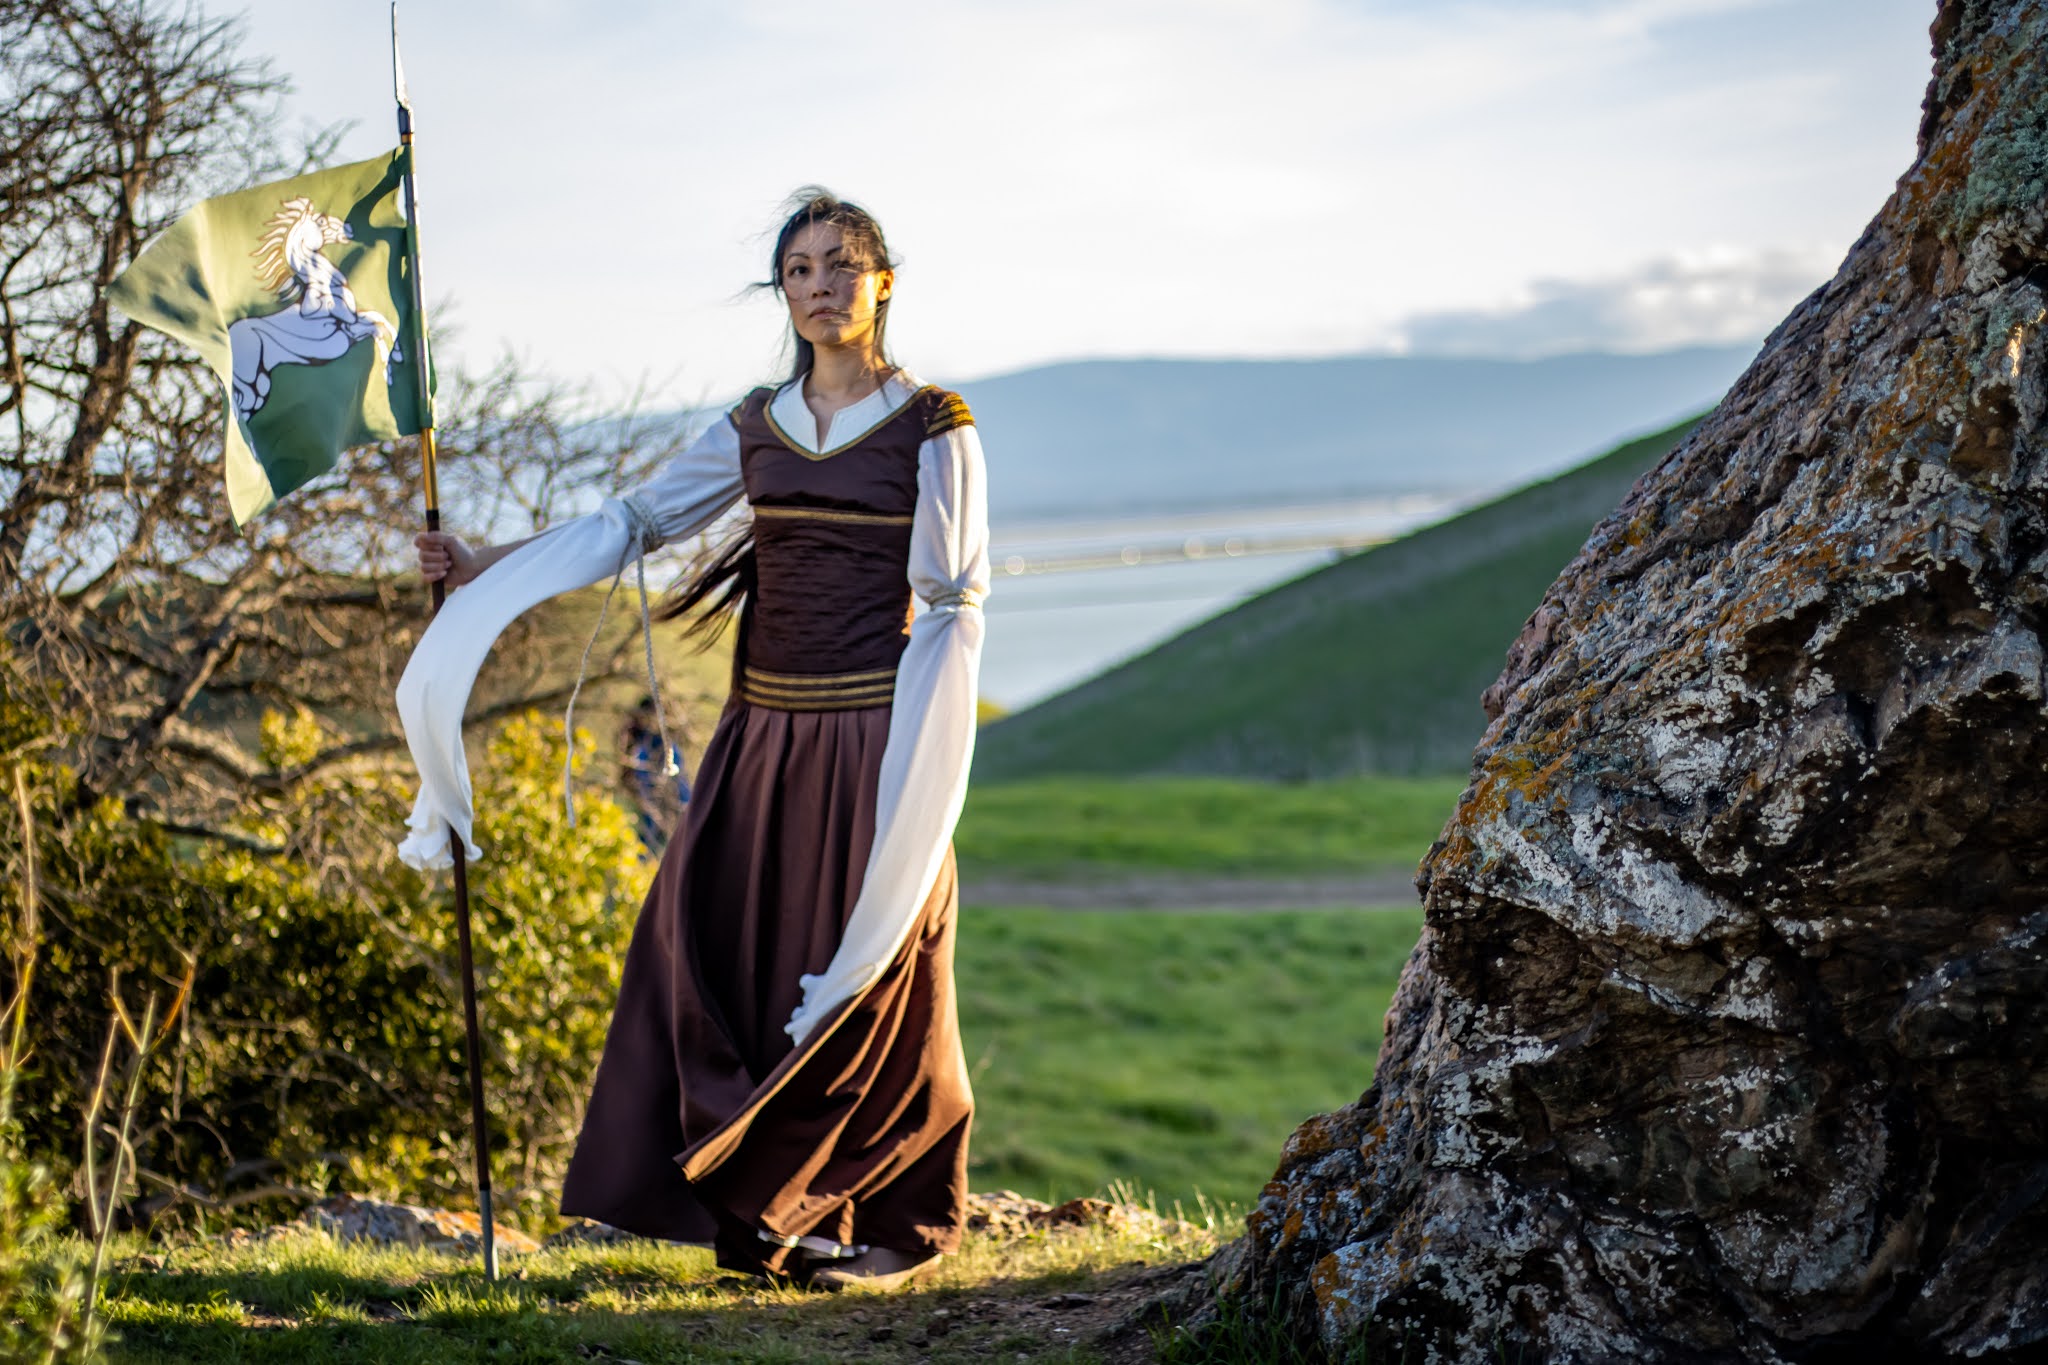
The (slightly lighter) brown outer skirt was again made from a thrifted sheet, in a half-circle using my TNT pattern, Simplicity 5006. Seriously, I use that skirt pattern for EVERYTHING, from Mulan to Ursula to Weaver Girl to theater costumes. Then it was just a matter of scouting an appropriate location; Coyote Hills Regional Park, with its eponymous hills and giant mounds of rocks, was absolutely perfect. My photographer, @captured.by.shirelle, did an absolutely fantastic job of capturing the whole mood and look of Eowyn, White Lady of Rohan, "fairest lady of a house of queens...standing straight and proud, shapely as a lily...as if wrought by elf-wrights out of steel."

Summary
Pattern: Simplicity 4940 for the outer bodice, Simplicity 5006 for the skirts, self-drafted for the sleeves, chemise bodice, and corselet
Fabric: Two twin-sized cotton sateen sheets for the skirts, half of another one for the outer bodice and corselet. Also 2 yards of 60" crinkle cotton for the sleeves, and half a yard of muslin for the chemise bodice, remnants of rayon jacquard for the neckline of the chemise, and remnants of cotton quilt batting for the corselet.
Notions: Seven yards of gold braid, four yards of white braid, five yards of brown rattail, three packs of dark brown bias tape, a handful of brass grommets, a separating zipper, and several hooks.
Techniques: Uhh...self-quilted fabric using a walking foot? Does that count as a technique?
Hours: Well, I started working on this last December, then took a break to finish up Weaver Girl, so all in all I'd say it was two months of my kind of work hours, which is to say an hour here or there after kids are asleep, if I don't have other work to do for school. There was also so much hand-sewing of trim that I did in five minute snatches while kids were playing-but-not-arguing-yet, so it's really hard to say. I want to say at least 35 hours based on rough estimates of how much time similar pieces took pre-kids.
Total cost: $65, but that includes $20 worth of gold pens for the flag, and then all the new trim I had to buy was pretty costly even with coupons. The main fabrics, though, cost less than $10.
Final thoughts: I've always loved strong female warrior characters, from Mulan to Alanna of Trebond to Aerin Firehair, so it was pretty much a given that I was going to love Eowyn the first time I came across her. It's just a nice bonus that her costumes in the movie were brilliant. Eowyn is also extra meaningful to me because of where I was in life when I first read LOTR. Growing up, it was always drilled into me that going into STEM was the only acceptable career path, and my passion for art and making things was not something to be celebrated or pursued seriously. When I got to college, for the first time I was away from home and somewhat free to make my own choices; I switched from a biology major to an art major just as The Two Towers came out, and I was struck by her fear of being caged, her desire to make her own path, one that was different from what was expected of her, and ultimately her seizing the opportunity for glory in battle as Dernhelm. I saw her act of secret rebellion as akin my decision to choose my own major, but unlike Eowyn I did not kill a foul dwimmerlaik. Instead, I saw that a huge public research university was probably not the best place to get an art degree if I wanted to actually learn skills (and not just do weird avant-garde pieces), so I switched back to biology. I did, however, decide to be a science teacher instead of a researcher, which ultimately meant that I had the opportunity to get my theater costuming feet wet via high school drama productions. Later, once I became a more seasoned teacher and didn't have to spend every waking hour thinking about lesson prep or grading, I was able to make time for actual sewing, drafting, and costuming classes at a local community college. In a not dissimilar arc, Eowyn was able to make peace with her role and place in society and chose to be a healer. Both of us found a compromise in our lives that eventually brought peace and joy, not a feeling of being caged. All this to say, making and wearing this Eowyn costume was a dream come true, and a fitting conclusion(ish beginning to a new story).

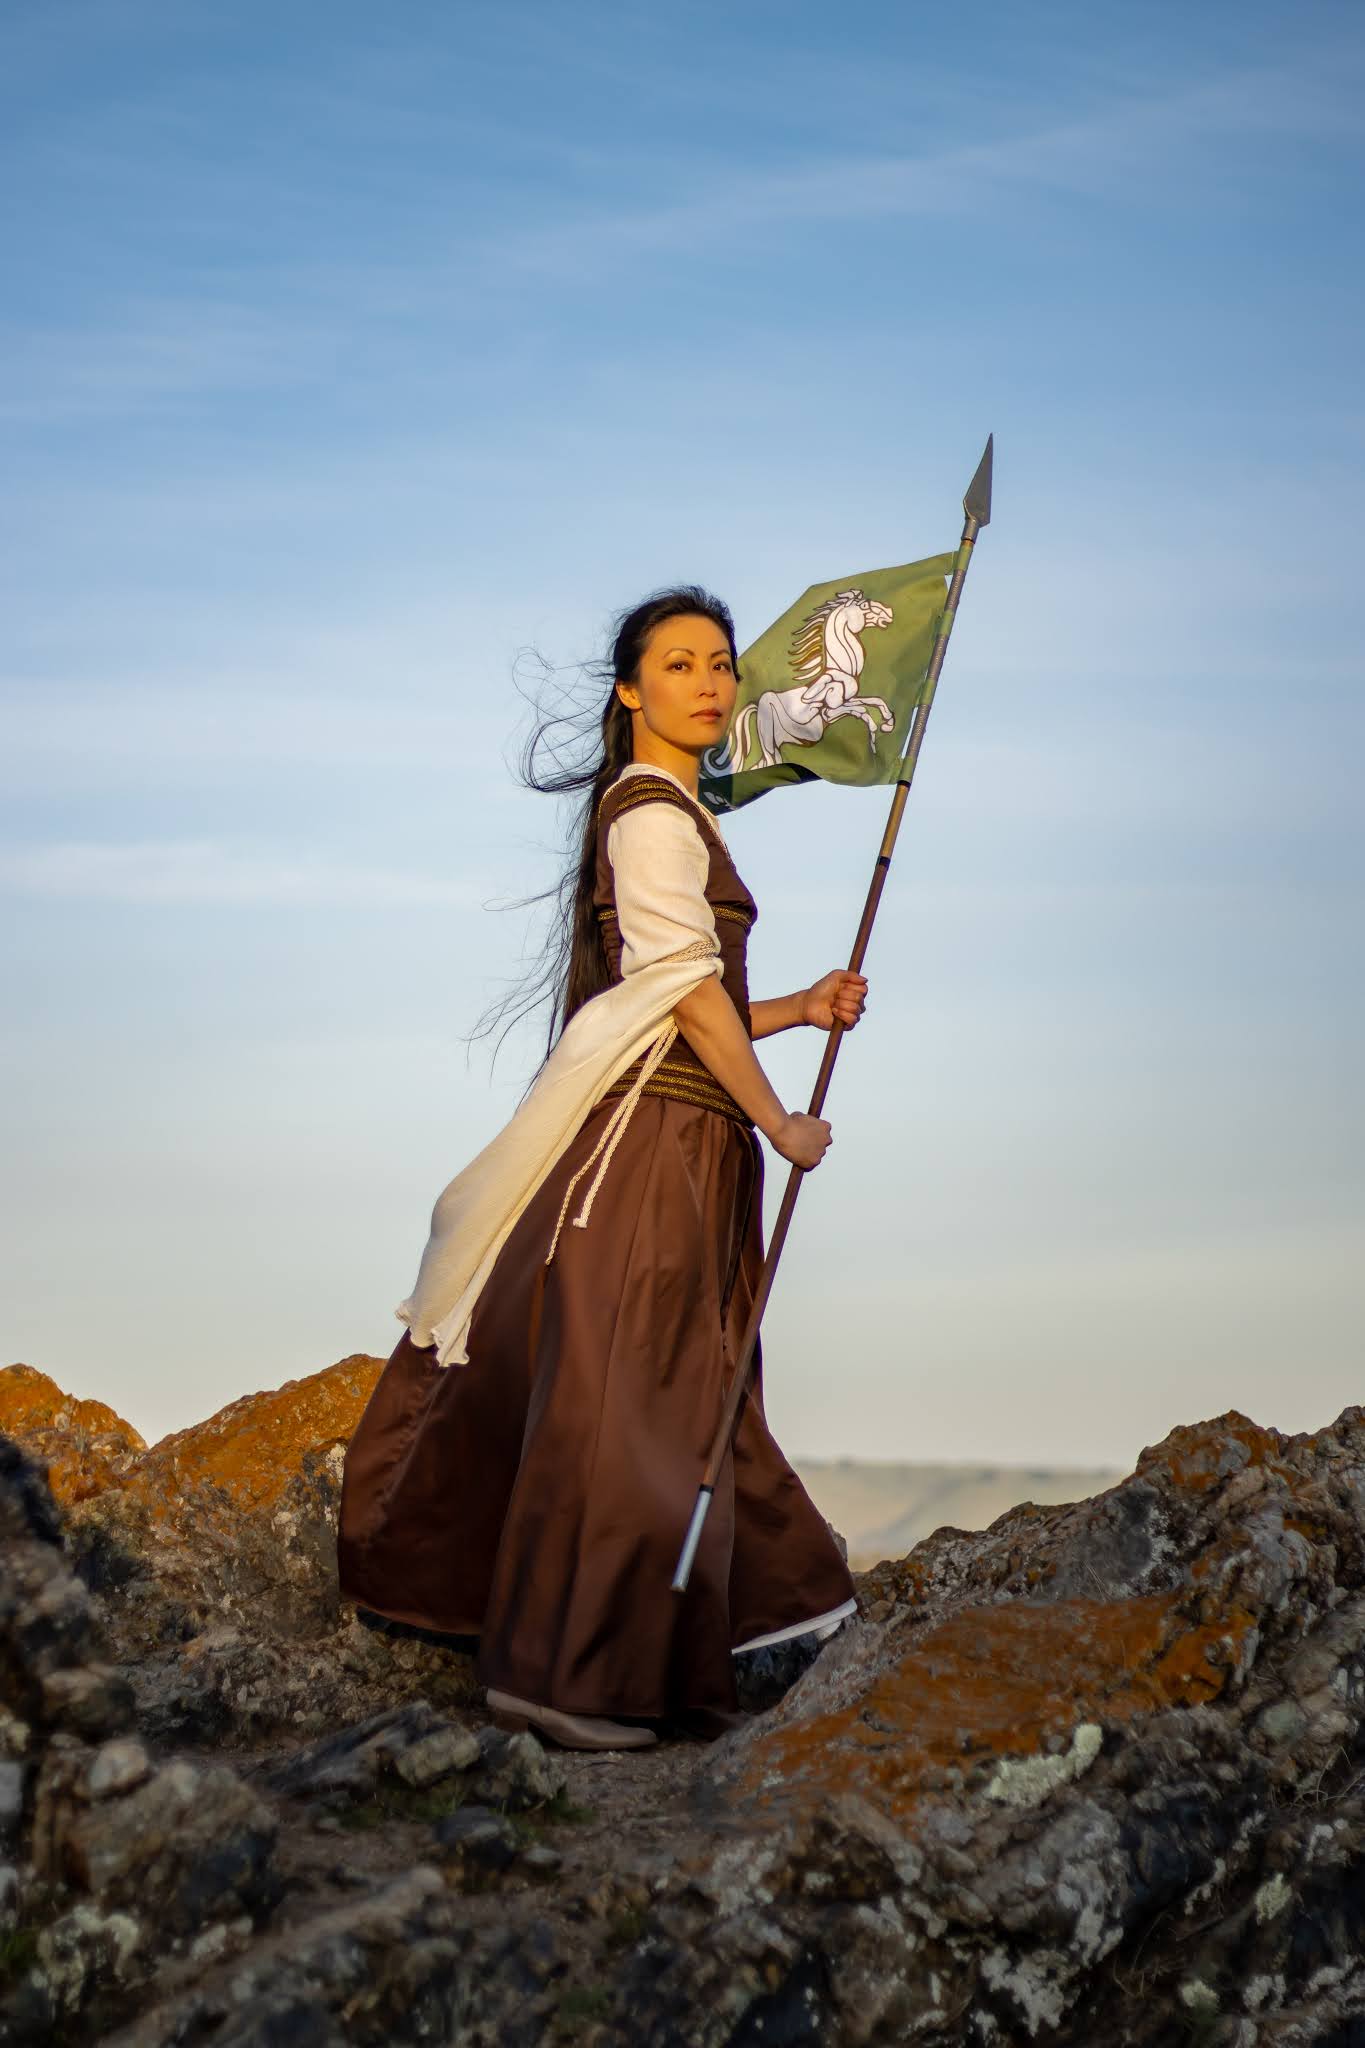
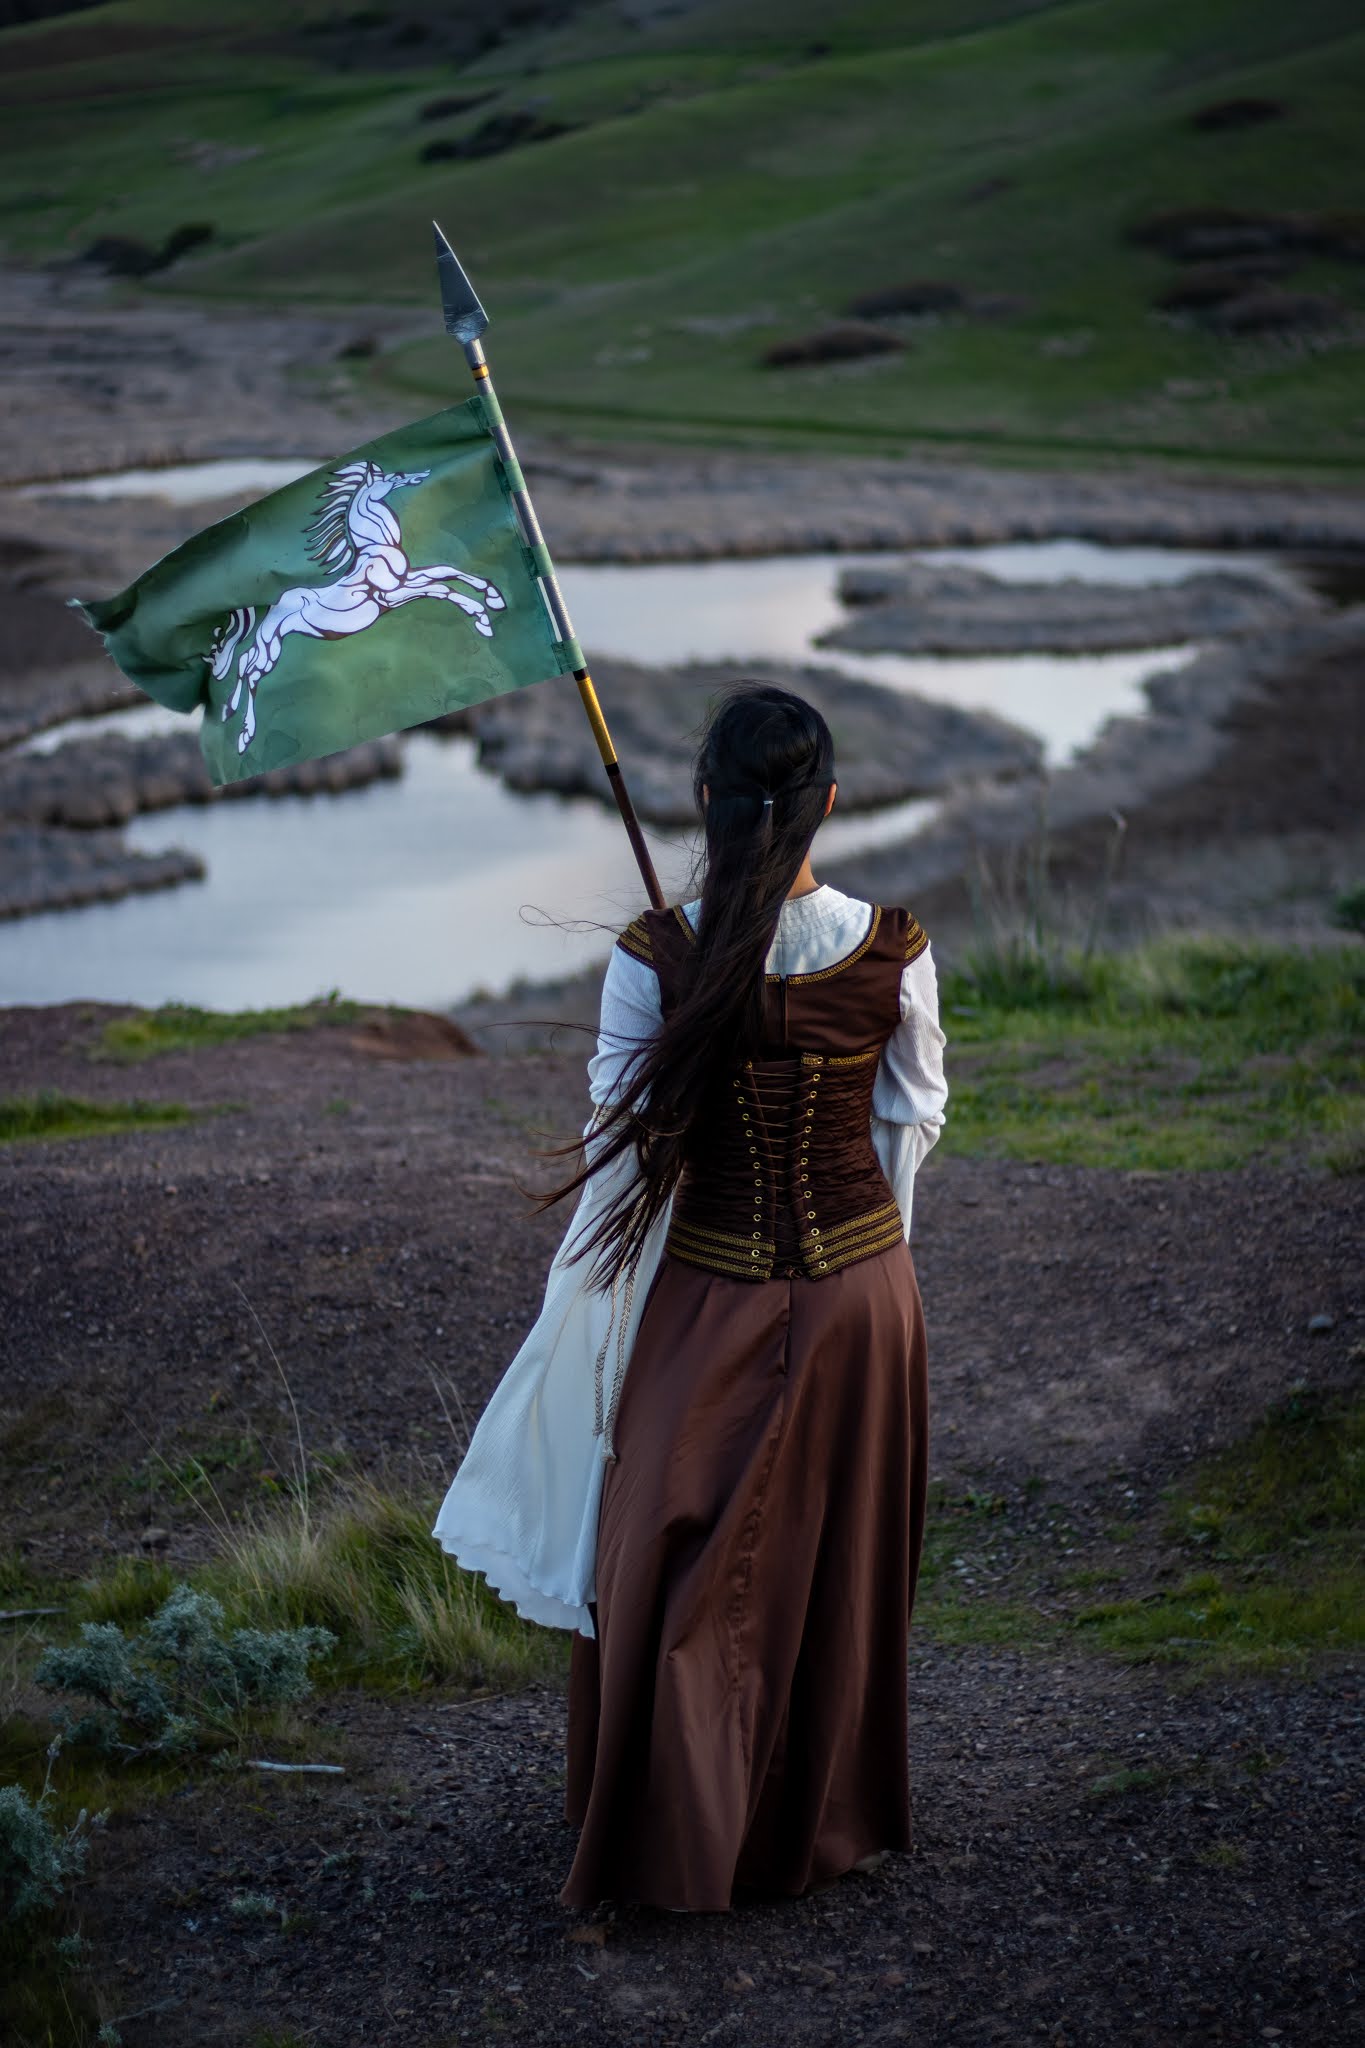
Oh! And the flag of Rohan! That was a ridiculous process of experimentation that I documented on my IG highlight, should you care to see all the wibbling I did about making it (and the rest of Eowyn). Tl;dr if you don't want to watch the story: I did an Elmer's glue resist in the outline of the Rohirric horse on a pillowcase, then painted it with watered down acrylic paint and used various gold paint pens to outline the horse. I used vintage bias tape to secure the flag to a spear (made from foam, duct tape, and a wooden dowel) leftover from a drama production. I hadn't even really planned to make it, but when I was planning for the photo shoot I realized that I didn't have a sword and I really need some kind of prop to hold or else I don't know what to do with my hands...I'm so glad it turned out as well as it did!